Let me preface this by saying that a year down the road, my shop still doesn’t have enough light. I have good light in a few places, including the Tormach enclosure because it has its own lighting, but area lighting leaves something to be desired, though it’s adequate.
But with all that, light was my #1 priority in my shop – not so much light sources as reflecting light so I could achieve more surface brightness without having to spend a lot on new light fixtures.
When I started, I had a typical garage floor of bare concrete. Concrete seems unique in its ability to absorb light since it is both matte and somewhat dark simultaneously. It takes a lot of light to make a concrete floor appear well illuminated.
About fifteen years ago, I had a revelation. I visited the factory floor in two of my employer’s facilities a few months apart. One had a sealed concrete floor with mercury vapor lighting in a gray steel framework above, the other had white epoxy-painted concrete with a white-painted ceiling structure and fluorescent lighting. The contrast couldn’t be more stark. You could see quite well in the first, but it felt dim – all the surfaces seemed drab and dingy looking, even when they were new (this facility has been around since the late 60s). The “newer” facility (the building dated back to the 1970s if not earlier, but had received a major facelift) seemed bright and more importantly everything you wanted to see was well lit without adding task lighting (at least externally). It felt like an office environment, yet it was a production floor building some fairly large items.
So it was this experience that colored my thinking when it came to the floor surface treatment and painting the walls as I cleaned out my garage in preparation for moving in new equipment.
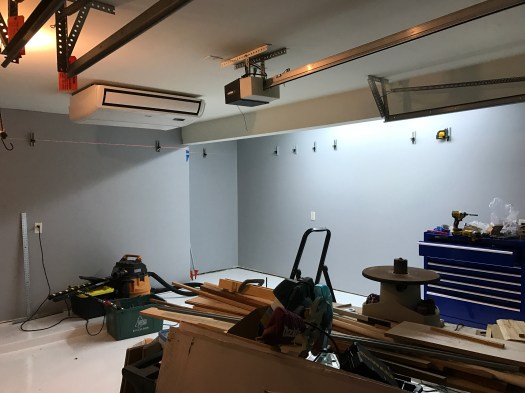
Here’s a picture of where I started, after significant removal of material. Nothing you see here remains as it was except for things attached to the ceiling.
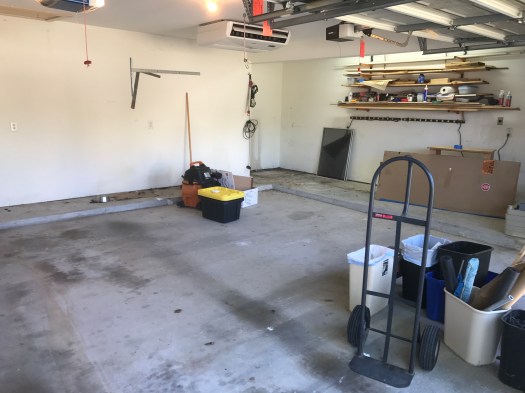
The experience at my employer’s production facility made it very clear to me that everything in this garage was going to be about one thing Light. I can attest after living here for 15 years before starting this project that the garage wasn’t a good workspace. Even with the lighting I had added, it was still dim in the workshop extension.
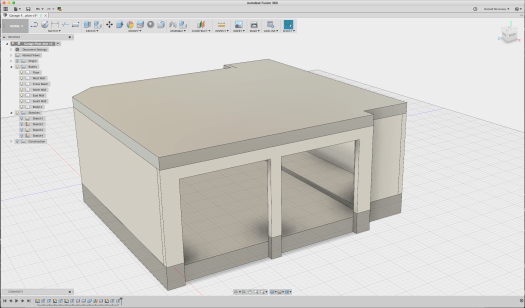
But I wasn’t happy with just taking a guess. I wanted to see what it would look like first. Having more time than money, I modified the floor and walls in my Fusion 360 model until I was happy with it.
So starting with the model from my last post, what you see is that the material I default to in Fusion 360 is 6061 Aluminum. Right. It’s shiny and gray colored. If you were to go render it you’d quickly discover that it reflects lots of light.
Let’s fix this by making the materials more realistic.
We’re going to use the F360 native material Limestone from the Stone folder in the Physical Material palette to represent concrete – there’s a ‘concrete’ in the appearance palette, but it’s tiled and doesn’t look right. Besides, we’re going to cover it up shortly anyway. The walls we’ll make out of paper in the “misc” folder in order to get a reasonable surface texture.
This should look approximately like my garage did when I started.

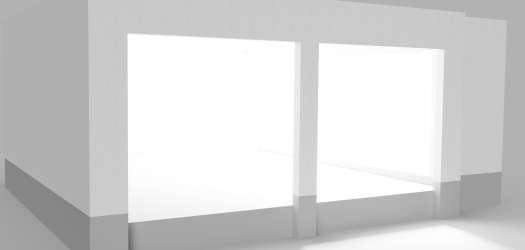
Let’s render this quickly so we can get a baseline look – with no ceiling – and get an idea what it will look like.

It doesn’t look bad, does it?
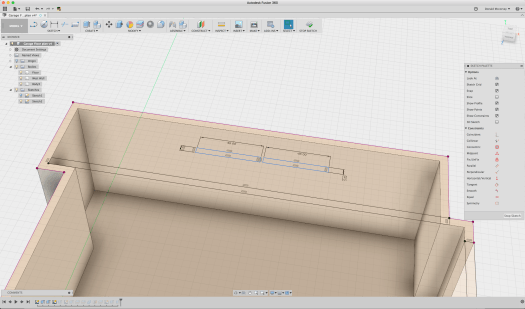
This is why you have to put in the ceiling… Things get a lot darker when you do that. So let’s use Sketch 2 from my previous post to create the ceiling since it includes the entire perimeter of the garage:

So let’s select all the profiles and create a ceiling as a new body:
Since the ceiling is covered in drywall, let’s make it from paper as well (we’re not doing strength calculations here, just evaluating lighting and colors). Now re-rendering it we get a much different result:

The renderer provides a strong light source that is blocked when you add the ceiling. So now we need to add at least some light to get a representative idea of what it will look like.
Let’s add some light sources. To date, I have a single LED light bulb in the middle of the ceiling and some daylight white fluorescents in the workshop extension.
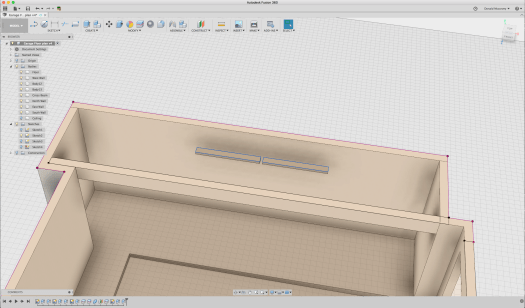
To make these lights, we turn off the ceiling and use Sketch 2 as a starting point, and create two rectangles 5×48″ long set end to end to create the fluorescents for the workshop extension:
Once the rectangles are laid out, extrude them about 2″:
What we’re going to do now is to create a light source by using the LED emissive appearance. And since only three faces emit any light, we’ll just apply it to those faces.
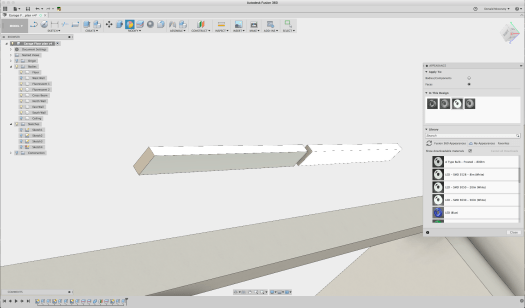
Once applied to the bottom and longitudinal sides of the fixtures, we put back the ceiling and the wall (removed temporarily to get easy access) and re-render it:
Obviously, I used the very brightest LED output to start with, so let’s make it closer to reality. A single fluorescent tube puts out between 50-67 lumens/watt, and the fluorescent tubes in these fixtures are 32 watts each. This means that a single fixture puts out 3200 lumens. The luminance value used by F360 is (essentially) lumens, so we can enter that directly.
Open the Appearance palette and double click the LED element used by the fluorescent fixture (it’s the bright white ring in the “in this design” box):

Now where you see the “luminance” edit box and change it from 48,000 cd to 3200 cd/m^2 and click “done”. Now re-render it:

So now we’re pretty accurately modeling the lighting in the workshop space. Let’s add another light fixture in the middle in the fixture that the builder installed – this time a daylight-white LED bulb. We’ll just model this as a 2.5″ diameter sphere of 1500 lumens:
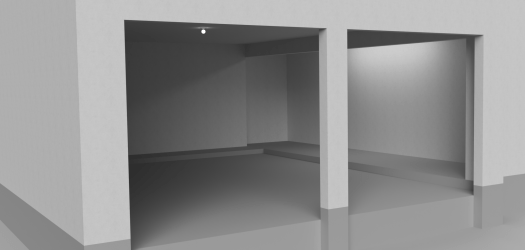
You’re right. It’s pretty dark. So I could add a LOT more lighting, but that’s a lot of work, and the concrete floor doesn’t help at all.
What are the options for a garage floor?
- A vinyl floor would be hard wearing and resistant to liquids – don’t forget that a car will be put on this floor every day – so some sort of roll out tile floor isn’t out of the question. Here’s an example, Congoleum sheet vinyl flooring which costs $2.97/sq ft from Lowes:

- A ceramic tile floor would work too. But grout, oil, and radiator coolant are probably a bad combination. Cost for material is anywhere from $4/sq ft and up, and installation is labor intensive.
- Plastic or rubber floor tile is an attractive option – it can be had in sheets or as individual lock-together tiles. Here’s an example, a white coin-pattern plastic tile for $3.79/sq ft, no adhesive required:

The good part with this stuff is that you can install it yourself and it’s easy to repair.
But think about it. You’re going to be moving some heavy stuff over this material – it needs to be very smooth and hard to be at all durable. Sure, it’s meant to be parked on, but how about running a pallet jack or an engine hoist over it? And I can tell you from experience that you’re going to get scratches and marks on it. A rubber tile can be replaced easily enough but it may make things more difficult when you are putting those heavy loads on it. (I thought for many years the right way to go was this sort of floor tile – it took quite a while for me to accept that this wasn’t the right option – and a 1200lb CNC mill…)
- Epoxy coatings are an economical solution. It takes about 2 gallons to completely cover a 2-bay garage floor. And at about six cents per square foot for the material, it looks like a very inexpensive solution.

This is the approach I went with, but not the stuff you buy at Home Depot or Lowes. There’s more to it than just cleaning and degreasing the floor to get the stuff to stick. I started researching ways to treat the floor and concluded that there are two accepted ways to go about it: 1) apply an acid etch to rough up the surface so the epoxy will stick to it better; 2) use a mechanical method to rough up the surface. The acid struck me as a bit of a dicey proposition because it will eat away at the calcium in the concrete if it’s not thoroughly washed away, so the mechanical solution struck me as a better way to go, if one I wasn’t going to want to do myself.
So what color to use? The normal color people put in a garage is some form of gray with the notion that it hides dirt. It’s also typical to distribute multi-colored flecks over the surface before adding the top coat.
But that flies in the face of two things: increasing surface brightness with the available light and finding stuff you’ve dropped on the floor. (If there’s one thing I’m really good at it’s dropping small things and spending lots of time looking for them) Speckles and dropped fasteners or small parts tend to look very similar. Things are a lot easier to see if you’ve dropped them on a solid color, and in particular white. White shows more dirt, no two ways about it, but it also means you know when you need to get down there and clean it! (and it’s easy to do with a dust mop)
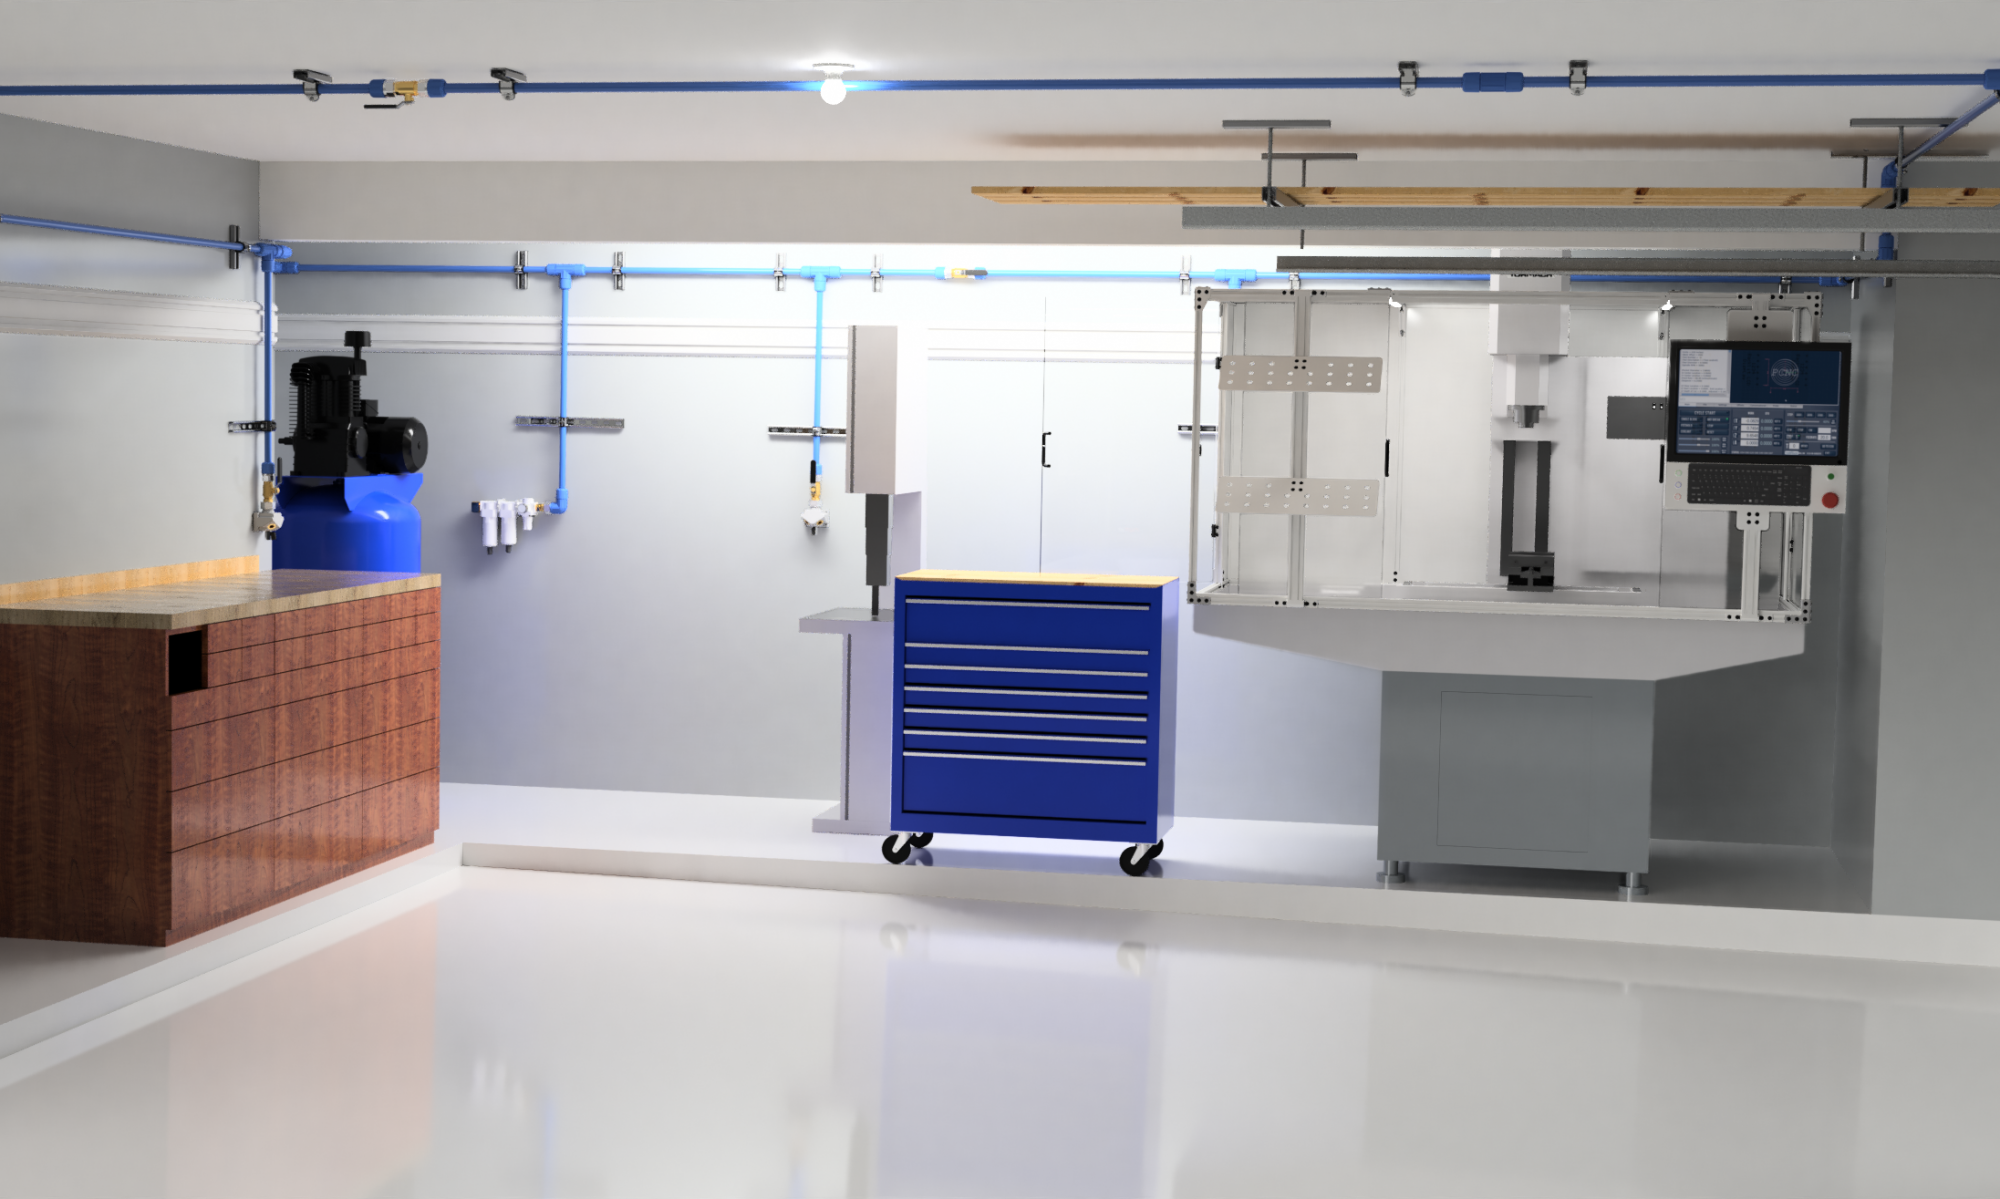
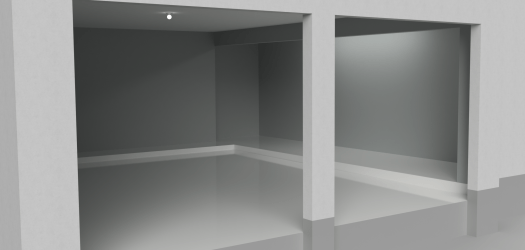
So how will this look? Let’s go back to the model. In the “appearance” palette, find the white gloss paint color, then apply it to the floor faces only.

The available light now reflects off the floor and makes the whole space brighter. The real surface is not as smooth and will not be quite as reflective, but this is a good enough representation.
I hired a local epoxy floor contractor, Houston Epoxy Floors, to do the work. The price was about $2.50/sq foot and well worth it because they did a good job and stood behind their work. They used a diamond hone to rough up the surface and then filled any surface cracks before applying a two-part epoxy paint and then finally applying a clear polyurethane wear coat on top.

It takes two color coats to do a plain white floor. With gray and flakes you can do it in one. Plan to pay extra to get that service, since there aren’t flakes in the coat to hide the thin spots in the white paint. If you have exactly the wrong concrete it might take three. Work with the contractor to figure it out.
It wasn’t quite as obvious before that the walls were scarred and tired looking so the next task was to fix the wall color.
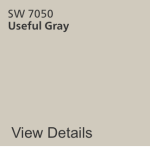
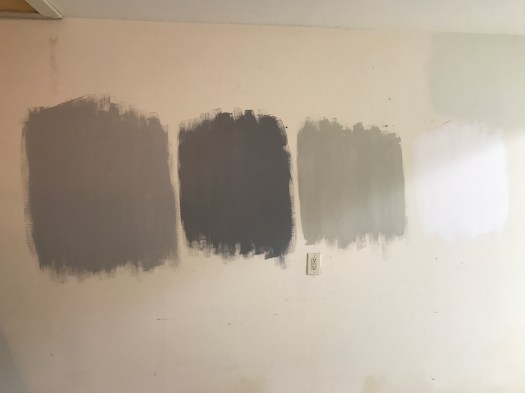
A trip to the Sherwin Williams web site followed by an in-person visit to one of their stores provided the information I needed – and three samples of paint. Since the floor is white, it seemed excessive to make the walls white as well – and they really would show every bit of dirt and wear.
I tried several samples of gray and a white color


To put this in the render, I opened a screen capture of the color from S-W’s web site in Autodesk Graphic an used the eyedropper function in the color picker to sample the color:

Using the above process to grab the RGB values, I tried all the colors I had sampled on the model first. Using the rough powder coat appearance as a base color, I changed the color from ‘gray’ to the RGB values of the color I wanted to try. The render of the Monorail Silver (RGB 184,188,187) came out pretty well – and is similar to the final result:
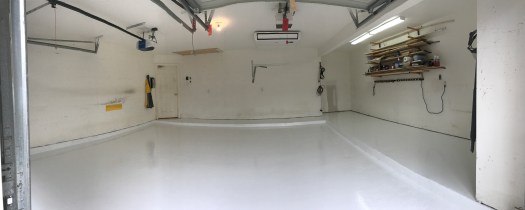
Because this is a garage, I bought Sherwin Williams best exterior latex semi-gloss paint and after patching many holes and scrapes in the drywall painted the walls. The end result took a few days, but came out fairly well:


There’s more to come, but next time we’ll talk about where to start putting things and how they actually ended up. Storage is the #1 problem in any garage, and there’s much not worked out yet. Note the wood and other stuff in the foreground above – that all had to find a home, and eventually did. It only moved about six feet… (Explaining that trick will probably require its own post, but it cost maybe $25 in materials and took an hour or so to do)
Have a great day, and thanks for reading!
UPDATE: Two days ago I added three 4ft 5000K 2-tube LED lights. There are dimmer operating rooms. Cost was fairly reasonable too in a 4-pack. I may add one more once I figure out how to mount it and hide the power cable.
